Silencer Operating Guide
Basic Assembly Instructions:
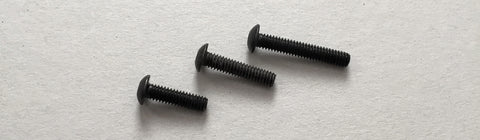
Step 1: Select screw length.
The Silencer comes with 3 screw lengths. Small holds 1-3 keys, Medium 2-4 keys, and Large 4-7 Keys.
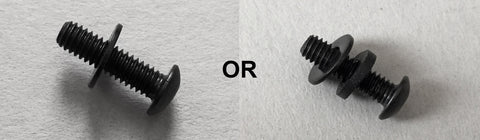
Step 2: Thread screw through rubber washer, then metal washer.
Note: Some setups don't require a rubber washer first if space permits. In this setup, simply thread a metal washer. Refer to the example guide at the bottom of the page for reference. Setups that require only 1 rubber washer use this alternate startup.
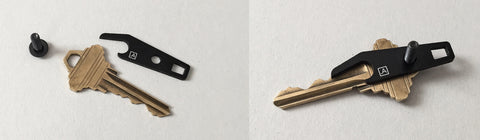
Step 3: Install keys and bottle opener.
Add your keys onto the screw. You can use metal washers between keys if desired and if space permits. Place the bottle opener within the keys in your preferred order. We recommend using the bottle opener as a partition to separate out your most commonly used keys from those less used.
Step 4: Add metal washers (as needed).
The locknut requires about 1/4" of screw space to fully tighten. We would recommend adding a few washers to close the gap if there is too much space left. Use the example guide at the bottom of this page as a reference for how many washers are needed.
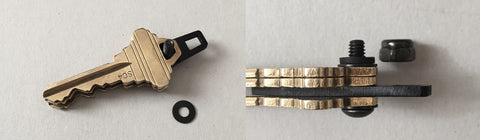
Step 5: Complete setup with metal washer, rubber washer, and locknut.
All setups should end with a metal washer, rubber washer, then locknut (in that order) for optimal grip.

Use the included hex key to tighten the locknut against the screw.

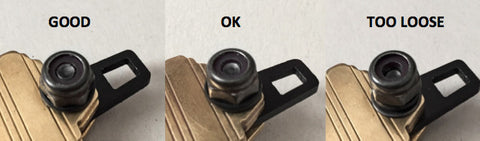
NOTE: Make sure the screw is tightened to be flush (or near flush) with the face of the nut for maximum grip. Screw may loosen under excessive wear and tear if the nut is not flush. The screw is tight enough if you can't easily unscrew the nut by hand.
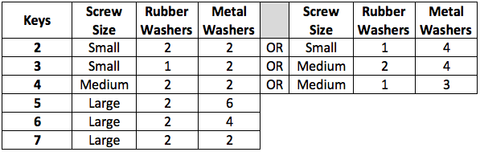
Example Setups / Combinations:

Also in Mission Log
Attaching MOLLE / PALS / ALICE gear to the ARKTYPE Dashpack
At ARKTYPE, we designed the ARKTYPE Dashpack to fit most MOLLE/PALS gear, and also be compatible with the older generation ALICE gear as well.
Click the link below to read more about attaching Modular Pouches to the ARKTYPE Dashpack.
Adjusting the Shoulder Harness on the Dashpack
The Dashpack is built with a unique, no-dangle shoulder harness design. The shoulder straps are free of loose hanging straps to maintain a clean, sleek look while being worn.
For some users, this is a new method to adjust the shoulder straps. This is a simple instructional guide on how to adjust the Dashpack's shoulder harness.
Click on the Read More link below for the full instructions.
Paracord Pull Cable Install Guide
This is a quick reference guide for tying the paracord pulls for the zipper pull cables, PMK pulls, and camera wrist strap pulls. All three use the same modified hitch knot method to install.
Click on the Read More link below to see the full detailed instructions.
